Print Your Own Cards: An In-Depth Guide for Home Printing
Types of Cards You Can Print At Home
Home printing offers a versatile solution for creating various types of cards tailored to specific needs. Whether for personal celebrations or professional purposes, you have a broad spectrum of options. Greeting cards, for example, are popular for expressing sentiments during holidays, birthdays, or special occasions. These cards often feature vibrant designs and personalized messages, making them memorable for recipients.
Business cards are another essential type that can be crafted efficiently at home, allowing entrepreneurs and freelancers to showcase their brand identity with custom layouts and finishes. Invitation cards for weddings, parties, or corporate events are also commonly produced at home, providing an opportunity to customize details such as event information, themes, and images.
Every category has unique characteristics, but the common factor is the need for quality materials and appropriate printing techniques to ensure professional appearance and durability. Using the right tools and supplies, you can produce high-quality cards that stand out and serve their intended purpose effectively.

Choosing the Right Printing Materials
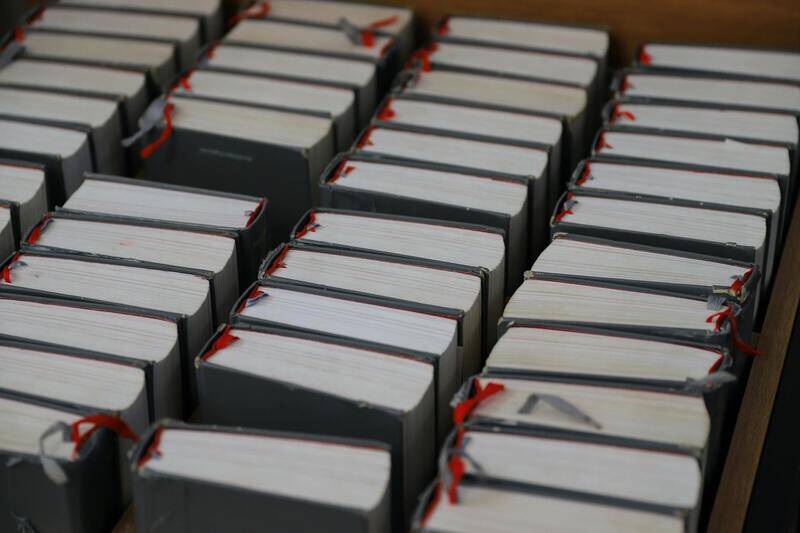
Selecting suitable materials is fundamental to achieving the best results when printing your own cards. The choice of paper or cardstock significantly impacts the card’s appearance, feel, and durability.
For greeting and invitation cards, thicker papers—such as 200-300gsm cardstock—are preferred, offering sturdiness and a premium feel. Glossy or satin finishes can enhance vibrant colors and details, while matte finishes provide a more subdued, elegant effect.
Business cards typically require a balance between thickness and flexibility. Standard options range from 300-400gsm, ensuring durability while maintaining a professional weight. Specialty papers with textures or embossed effects can add a unique touch.
In addition to paper thickness and finish, considering special features such as waterproof or tear-resistant materials can extend the lifespan of your cards, especially for outdoor or frequently handled items.

Designing Your Cards
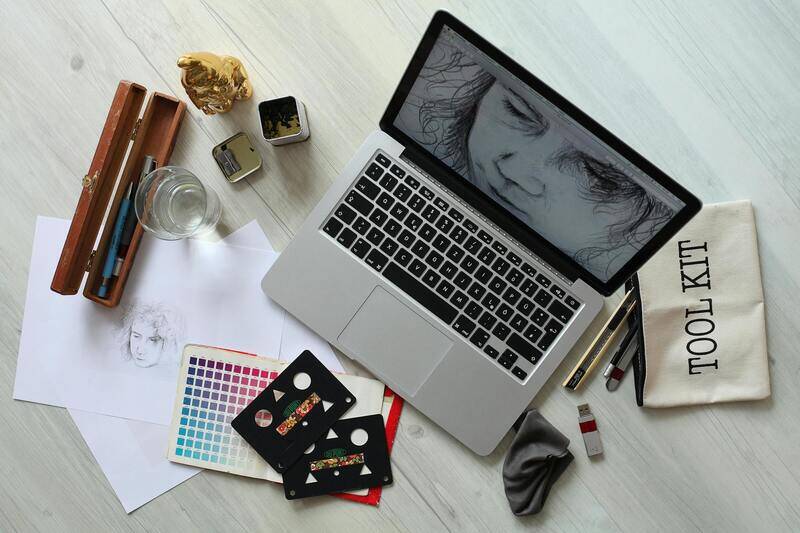
Design is a critical component that influences the overall impact of your printed cards. Modern design software and online tools allow for easy customization, enabling you to incorporate personal or brand-specific visuals, fonts, and messages.
When designing, keep in mind the dimensions of your intended cards, ensuring that all elements are within safe margins to prevent cropping during trimming. Including high-resolution images and vector graphics helps maintain clarity and sharpness.
Color schemes should be carefully selected to match the purpose of the card and the intended audience. For example, vibrant colors are suitable for celebration cards, while subdued tones are appropriate for formal invitations.
You should also consider the readability of text, choosing contrasts that make messages clear and legible. Utilizing templates can streamline the design process, especially if you wish to produce multiple identical cards.

Choosing the Right Printing Materials
When embarking on the journey to create your own custom cards, selecting appropriate printing materials is a crucial step that influences both the aesthetic appeal and durability of your final product. The variety of options available allows for customization tailored to specific needs, whether they are for business branding, personal projects, or special events.
One of the most common materials used for printing high-quality cards is cardstock, which provides a sturdy base that withstands handling and gives a premium feel. Standard cardstock typically ranges between 300-400gsm, offering a good balance between rigidity and flexibility. For luxury or special occasion cards, heavier or specialty papers with textured finishes—such as linen, embossed, or matte—can significantly enhance tactile appeal.

Solid core or coated papers are suitable choices for printing vibrant, clean images and text. Coated papers, especially those with satin or gloss finishes, provide a smooth surface that enhances color vibrancy and sharpness, making them ideal for detailed graphics or photos. Conversely, uncoated papers lend a subdued, natural look that works well for more understated designs.
Waterproof or tear-resistant materials are increasingly popular for cards intended for outdoor use or frequent handling. These specialty papers are crafted with polymer layers or proprietary coatings that repel water and resist tearing, ensuring your cards maintain their quality over time. Additionally, adhesive-backed papers can be used for creating stickers or labels, adding a layer of versatility to your printing options.
Finishing Options to Enhance Your Printed Cards
- Matte Finish: Reduces glare, providing a soft, elegant appearance that complements muted color palettes.
- Gloss Finish: Enhances color vibrancy and adds a shiny, reflective surface for a more striking look.
- Satin Finish: Strikes a balance between matte and gloss, offering a smooth, semi-gloss surface that is both appealing and practical.
- Varnish or Lamination: Adds a protective layer that resists scratches, moisture, and UV exposure, extending the lifespan of your cards.
Choosing the right material and finish depends on the purpose of your cards and the impression you wish to make. For example, business cards benefit from a sleek gloss or matte finish for a professional feel, while greeting cards may be enhanced with textured or embossed surfaces for a unique tactile experience.
Factors to Consider When Selecting Printing Materials
- Durability: Ensure the material withstands handling and environmental factors relevant to usage.
- Visual Appeal: Match the texture and finish to the design aesthetic and target audience.
- Compatibility: Verify that your chosen papers are compatible with your printing equipment, particularly if using inkjet or laser printers.
- Cost: Balance quality with budget constraints, especially when printing in bulk.
By carefully selecting the appropriate printing materials, you can produce premium, professional-looking cards that resonate with your intended audience and stand the test of time.
Types of Cards You Can Print At Home
When venturing into printing your own cards, the possibilities extend across a variety of card types, each serving a specific purpose and requiring different approaches to design and material selection. Recognizing the distinct types of cards that can be produced at home allows for tailored customization, ensuring the final product aligns with your desired outcome. Classic options include business cards, greeting cards, invitations, loyalty cards, and even custom playing cards. Each type demands particular printing methods, finishes, and materials to achieve the best results.
Business Cards
Personalized business cards are essential tools for networking. They convey professionalism and brand identity, often requiring high-quality cardstock with a smooth or textured finish. At-home printing allows for quick modifications, bulk production, and the inclusion of detailed information such as logos, contact details, and design elements that reflect your personal or company brand. While durable, lightweight materials are preferred to ensure ease of distribution and handling.
Greeting and Occasion Cards
Creating personalized greeting cards for birthdays, holidays, or special occasions offers meaningful, custom expressions of sentiment. These cards often leverage vibrant color schemes, decorative embellishments, and textured papers. Home printing provides the flexibility to adapt designs for different occasions, incorporating photos, handwritten messages, and intricate patterns without the constraints of mass production constraints.
Invitations and Event Cards
Whether for weddings, parties, or corporate events, custom invitations set the tone for the occasion. High-quality cardstock with matte or gloss finishes can make invitations stand out. Designing at home enables you to incorporate thematic visuals, RSVP details, and personalized touches that reflect the event's personality, providing an elegant yet cost-effective solution for host customization.
Loyalty and Membership Cards
Businesses can leverage at-home printing to produce loyalty or membership cards with embedded QR codes, barcodes, or magnetic strips. These cards typically require durable materials with a smooth finish to facilitate printing of security features and durability. Custom designs help reinforce branding and create a cohesive customer experience without significant investment.
Playing and Collectible Cards
Enthusiasts and hobbyists often print custom playing cards or collectible cards, emphasizing high-resolution images and specialized finishes. Card stock with a weighted feel, glossy or satin finishes, and rounded corners are standard. Home printing grants the flexibility to produce limited editions and personalize each card with unique artwork or information, making it ideal for gaming, gift sets, or promotional purposes.
Additional Card Varieties
Beyond these common types, at-home printing also supports niche applications such as gift tags, loyalty punch cards, thank you notes, or custom informational cards. Understanding the specific requirements for each type—including size, weight, and finish—helps in selecting appropriate materials and printing techniques to elevate the quality and appeal of your cards.
Cutting and Finishing Your Cards
After successfully printing your cards, the next crucial step involves cutting and finishing to ensure a professional appearance. Precision in cutting is essential to achieve even edges and a polished look. Using a high-quality paper trimmer or guillotine cutter can make this process more accurate and save time. If you're working with multiple cards or complex designs, consider using a craft cutting machine that allows for detailed cuts and consistent results.
For a refined finish, rounding the corners of your cards is often desirable, especially for business or greeting cards, providing a softer, more inviting aesthetic. Corner punchers designed specifically for card crafting can produce uniform rounded corners effortlessly. Smooth edges help reduce the risk of fraying or damage over time, extending the utility and presentation of your cards.
Beyond cutting, finishing touches can significantly enhance the overall quality. Applying a protective coating, such as a clear laminate or UV coating, adds durability and a glossy or matte finish, depending on your preference. These finishes protect against scratches, stains, and general wear, especially important for cards that will be handled frequently. While some finishes require specialized equipment, many spray or brush-on options are available for home application.
For cards intended for frequent use or exposure to elements, consider adding a thin layer of adhesive-backed laminate films. These are easy to apply and offer excellent protection while maintaining the card's flexibility and appearance. Proper finishing ensures your printed cards remain vibrant and intact over time, whether used for business purposes, personal projects, or collectibles.
Common Challenges and Troubleshooting
Despite careful planning, at-home card printing can present challenges. Common issues include ink smudging, uneven cuts, or color inconsistencies. Addressing these problems involves understanding their causes and applying targeted solutions.
- Ink Smudging: Often caused by using incompatible or low-quality paper or by printing too quickly. Switching to higher-grade, compatible materials and adjusting print speed or drying time helps mitigate this issue.
- Uneven Cuts: Results from inaccurate measurements or dull blades. Regularly checking cutting tools and using guides or rulers can improve precision.
- Color Inconsistencies: Occur due to printer calibration issues or incompatible ink/paper combinations. Regularly calibrate your printer and perform test prints before final runs to ensure color accuracy.
Implementing these troubleshooting strategies ensures your cards consistently meet a professional standard, saving both time and material costs over repeated projects.
Legal and Design Considerations
When designing and printing your cards, adherence to copyright and trademark laws is essential. Use original artwork or legally licensed images to avoid intellectual property disputes. Maintaining original, high-resolution designs ensures clarity and professionalism, especially when printing on larger quantities.
Designing for print also requires attention to detail, including safe margins, bleed areas, and high-resolution images to prevent pixelation or cut-off elements. Stay updated with best practices in print design to optimize appearance and compliance, ultimately producing cards that are both attractive and compliant with standard printing guidelines.
Where to Find Resources and Supplies
To enhance the quality of your at-home card projects, sourcing the right supplies is essential. High-quality card stocks, adhesives, cutting tools, and finishing materials can be procured from specialized craft stores or online retailers dedicated to printing supplies. Additionally, many local print shops offer advice or sell professional-grade materials suitable for home use.
Always choose supplies that match your printer’s specifications, especially regarding thickness and coating compatibility. Investing in reliable tools and materials not only improves your output but also streamlines the workflow, allowing for consistent and satisfying results in your card printing endeavors.
Types of Cards You Can Print At Home
Home printing offers a versatile way to produce a wide range of cards tailored to specific needs and occasions. The types of cards you can create are nearly limitless, provided you select appropriate materials and printing techniques. Popular options include greeting cards for birthdays, holidays, and special occasions. These can be customized with personal messages, photos, and artwork to create heartfelt and unique expressions of sentiment.
Additionally, business cards remain a staple for professionals aiming to establish a memorable first impression. With quality cardstock and precise printing, you can craft professional-grade cards that reflect your brand identity without relying on commercial printing services. Invitation cards for events such as weddings, parties, and corporate gatherings are also easily produced at home. These invitations often require elegant designs and high-quality finishes to impress your guests.
Educational and promotional cards are also popular choices. Flashcards for study sessions, loyalty cards for small businesses, or coupon cards for marketing campaigns can all be efficiently printed at home. Custom name tags, thank you cards, or even collectible trading cards represent additional categories that benefit from home-based production. The key to success lies in selecting the right cardstock, adhering to good design practices, and utilizing suitable printing technologies to achieve professional results.

Choosing the Right Printing Materials
Achieving high-quality results starts with selecting the appropriate printing materials. The choice of cardstock significantly influences the finished look and feel of your cards. Heavier, acid-free cardstock with a smooth finish tends to produce professional-grade cards suitable for both personal and business use.
For vibrant and detailed images, opt for coated or semi-glossy papers, which enhance color depth and sharpness. Matte finishes, on the other hand, provide a more subdued and elegant appearance, ideal for cards requiring a sophisticated tone. It’s essential to consider the compatibility of your printer with the chosen media, especially regarding thickness and coating type to prevent jams or poor print quality.
In addition to cardstock, printing enthusiasts should consider using adhesives, patterned papers, or overlay sheets for special effects or additional durability. If embellishments or textures are desired, foils, lenticular prints, or embossed accents can be added during or after the printing process using compatible equipment. High-quality inks and toners are equally crucial, ensuring colors are vivid and long-lasting.

Designing Your Cards
Design plays a vital role in creating impactful and aesthetically pleasing cards. Utilize design software that offers user-friendly templates and tools tailored for print projects. Programs such as Adobe Photoshop, Illustrator, or dedicated online card design platforms provide excellent options for creating custom layouts, incorporating images, text, and decorative elements.
When designing, adhere strictly to print guidelines by setting safe margins, bleed areas, and resolution standards. A standard resolution of 300 DPI is recommended for sharp, clear images and graphics. Incorporate consistent fonts, color schemes, and branding elements to produce cohesive and professional designs.
Personalization is key—adding photos, hand-written elements, or unique artwork elevates your cards from generic to memorable keepsakes. Ensure your designs are compatible with your printer’s color profile and paper type to prevent issues like color mismatches or paper jams. Preview your artwork thoroughly before printing to achieve the best possible outcome.
Printing Techniques and Settings
Choosing the appropriate printing technique depends on the type of card you aim to produce and the finish desired. Inkjet printers excel with glossy and coated papers, delivering vibrant colors ideal for photo-heavy designs. Laser printers are preferable for high-volume projects, offering crisp text and sharp lines with faster turnaround times and durable results.
Adjust printer settings to optimize quality—select the highest print resolution available, typically 1200 DPI for detailed designs. Use the correct paper type setting that matches your cardstock (e.g., heavy-weight or card stock setting). For edge-to-edge printing, ensure bleed settings are properly configured to avoid unwanted borders or cut-offs.
To prevent smudging or misalignment, consider printing a test page first. For special finishes such as foil, embossing, or lamination, specialized equipment or services may be required, but basic home printing can achieve stunning results with proper settings and high-quality materials.
Types of Cards You Can Print At Home
Printing your own cards at home opens up a multitude of possibilities across various personal and professional needs. Among the most common types are greeting cards, business cards, thank-you notes, invitation cards, loyalty cards, and even greeting tags for gifts. Each of these categories benefits from tailored designs, specific paper selections, and suitable printing techniques to achieve polished results.
Greeting and Occasion Cards
Greeting cards for birthdays, holidays, and personal milestones are popular options for home printing. High-resolution images, heartfelt messages, and decorative elements can make these cards unique and memorable. Choose sturdy cardstock with a matte or gloss finish depending on your design aesthetic to ensure a professional look.
Business Cards
Creating custom business cards in-house allows for quick updates and cost-effective branding. Use high-quality card stock with a smooth finish for a sleek appearance. Incorporate your logo, contact details, and branding elements carefully to maintain consistency and professionalism.
Invitation and Event Cards
Hosting an event or celebration? Designing and printing personalized invitations from home can add a special touch. Use elegant fonts, include event details clearly, and consider embellishments like foil or embossed text for added sophistication.
Loyalty and Membership Cards
For small businesses or clubs, printing loyalty or membership cards can be a straightforward process. Durable, tear-resistant material combined with clear, bold visuals ensures the cards are functional and visually appealing.
Other special cards, such as gift tags or name cards, can also be produced with ease at home, adding a personalized dimension to everyday items. When selecting the type of card to print, consider the intended use, required durability, and the desired aesthetic to guide your choices in material and design.
Choosing the Right Printing Materials
Achieving professional-quality cards at home hinges on selecting suitable printing materials. The right paper or cardstock, combined with proper ink or toner, defines the overall appearance and durability of your finished product.

Paper and Cardstock Options
- Standard Cardstock: Ideal for most greeting, business, and invitation cards. Look for weight options between 200gsm and 350gsm for durability and stiffness.
- Glossy or Satin Finish: Best for photo-heavy designs requiring vibrant color reproduction; provides a sleek, shiny surface.
- Matte Finish: Suitable for elegant and understated cards, offering a non-reflective surface that’s easy to write on.
- Textured or Specialty Papers: Adds tactile interest and a sense of uniqueness; often used for luxury invitations or personal stationery.
Printer Compatibility and Ink Types
Match your materials with your printer's capabilities. Inkjet printers excel with glossy and coated papers, producing vibrant, detailed images, while laser printers offer sharper text output and are more suitable for bulk production. Use pigment-based inks for longevity and resistance to fading, especially if your cards will be handled frequently or displayed outdoors.
Adhesives, Lamination, and Embellishments
Consider additional finishing options such as laminating sheets or adhesive layers for extra durability. Small embellishments like foil accents, embossing, or die-cuts can elevate basic cards, but often require specialized equipment—these are worth exploring for premium finishes.
Designing Your Cards
Creating visually appealing cards at home involves a strategic approach to layout, graphics, and typography. Incorporate high-resolution images, harmony in color schemes, and clear messaging to ensure your cards stand out.
Use professional design software or user-friendly templates compatible with home printers. Maintain consistency across your designs to reinforce branding or personal style, such as matching colors and fonts that reflect your intended message or occasion.

Keeping Design Simple Yet Impactful
- Limit the number of fonts to 2-3 for readability.
- Maintain clear margins and alignment for a tidy appearance.
- Use high-contrast color combinations for readability and visual interest.
- Incorporate visual hierarchy to guide the viewer’s eye.
Personalization and Custom Elements
- Add photographs or hand-written notes for a personal touch.
- Include decorative elements like borders, patterns, or textures.
- Use unique artwork or illustrations to make your cards one-of-a-kind.
Printing Techniques and Settings
Optimizing your printer settings is crucial to achieving crisp, vibrant results. Selecting the correct print mode, resolution, and paper type ensures your cards look professional and polished.
Understanding Print Modes and Resolution
- Use the highest available DPI (such as 1200 DPI) for detailed images and crisp text.
- Choose print modes labeled “Photo” or “High Quality” for best color accuracy and sharpness.
- Adjust color profiles within your printer’s software to match your design’s color space, ensuring color fidelity.
Proper Printer Settings and Bed Management
- Select the appropriate paper type setting for your cardstock to prevent ink smudging or misalignment.
- Use borderless or edge-to-edge printing options to achieve seamless designs without unwanted borders.
- Always perform test prints to verify settings before running a large batch.
Handling Finishing Processes
- If your design involves special effects like foil or embossed details, consider home methods for partial effects or use professional services for more advanced techniques.
- Allow printed cards to dry fully before handling or trimming to prevent smudging or smearing.
- Implement clean, flat surfaces during printing to minimize errors and produce consistent results.
Choosing the Right Printing Materials
Selecting high-quality materials is essential for creating durable, professional-looking cards at home. The choice of paper or cardstock significantly influences the final result, affecting both appearance and handling. When printing your own cards, opt for heavy-weight cardstock with a smooth or semi-gloss finish, typically ranging from 250 to 350 gsm, to ensure sturdiness and vibrant print quality.
Consider the texture and thickness based on the purpose of your cards. For instance, wedding invitations or business cards benefit from a thicker, matte or gloss cardstock, while greeting cards might work well with textured or recycled paper to add an artisanal touch.

In addition, verify that the material is compatible with your printer type—whether inkjet or laser—to prevent issues such as smudging or misfeeding. For inkjet printers, coated papers like satin or semi-gloss are ideal because they absorb ink smoothly for crisp images. Laser printers require papers designed to handle high heat without warping, such as specific laser-compatible cardstock.
Designing Your Cards
Effective design combines aesthetics with functionality, ensuring your cards leave a memorable impression. Use vector illustrations and high-resolution images to maintain clarity during printing. Incorporate elements such as borders, icons, and personalized text to craft a unique piece that reflects your style or brand.
When designing, maintain a consistent color palette aligned with your purpose. Utilize design software that offers precise control over layout and typography, allowing for professional-quality results even with basic tools.
- Maintain adequate margins to prevent important elements from being cut off during trimming.
- Use layers to manage complex designs and facilitate easy updates.
- Include bleed areas (usually 3mm) around the edges to ensure seamless edges after trimming.
- Preview your design at actual size to check for issues before printing.
Printing Techniques and Settings
Choosing the appropriate printing method enhances the quality and durability of your cards. Inkjet printers are versatile for various paper types and excel at producing rich colors and gradients, making them ideal for photo-heavy designs. Laser printers, on the other hand, provide sharp text and clean lines, suitable for professional business cards.
Adjust your printer settings meticulously for the best output. Set the resolution to the highest DPI available—commonly 1200 DPI—to ensure fine details are crisp. Select print modes like “High Quality” or “Photo” mode compatible with your printer to optimize color vibrancy and sharpness.
Color management is vital; align your printer’s color profiles with your design software to achieve consistent hues. Using ICC profiles designed for your printer and paper type ensures accurate color reproduction, especially for complex color schemes.
Always perform test prints to troubleshoot potential issues such as misalignment, color inaccuracies, or smudging before executing a full batch. Use borderless printing features to eliminate unwanted margins and achieve a seamless look.
Cutting and Finishing Your Cards
Post-printing finishing touches significantly influence the professional feel of your cards. Use a precision guillotine or a high-quality paper cutter to achieve clean, straight edges. For more detailed cuts or rounded corners, consider a corner punch or craft knife with a metal ruler.
Once cut, inspect each card for imperfections. For cards requiring special effects, like foiling or embossing, assess whether these can be incorporated during home production or if professional services might be necessary for more intricate techniques.
Allow the ink to dry completely before handling to prevent smudges. Store printed cards flat in a dry environment until fully finished. If needed, apply protective coatings like spray laminates or UV sprays to enhance durability and appearance.

Types of Cards You Can Print At Home
When exploring options for printing your own cards at home, the variety of formats and types available allows for extensive customization to suit personal, professional, or promotional needs. Common types include greeting cards, business cards, invitation cards, loyalty cards, and special occasion cards such as wedding or birthday cards. Each type benefits from specific paper choices, design considerations, and printing techniques to ensure a polished appearance. For example, greeting cards often feature foldable designs with decorative envelopes, requiring thicker cardstock and precise folding tools. Business cards demand a sleek, professional finish, often utilizing matte or gloss coating to enhance visual appeal. Invitations can range from simple designs to elaborate embossed or foil-stamped styles, making high-quality printable papers essential. Understanding the characteristics of each card type helps in selecting the appropriate materials and techniques for optimal results.

Choosing the Right Printing Materials
Selecting suitable printing materials is critical to achieving professional-looking, durable cards. The primary consideration is paper or cardstock weight; commonly, card stock ranges from 200gsm to 400gsm, with heavier weights offering sturdiness and a premium feel. Coatings such as matte, gloss, or satin may influence the card's finish and tactile experience, while textured papers can add a unique element to specialty cards. Additionally, compatibility between your printer and the chosen material must be verified; not all printers support thick or textured papers. Inkjet printers excel with thick, coated papers and produce vibrant color reproduction, whereas laser printers are better suited for high-volume printing with crisp details. For metallic or special effects, consider metallic or pearlescent papers designed to enhance specific finishes, especially when using specialty inks or foils. Proper material selection ensures your printed cards will have the professional quality and durability expected for their purpose.
Designing Your Cards
Effective design is key to creating eye-catching custom cards. Use vector-based design software to produce scalable graphics that remain sharp at all sizes. Maintain high resolution (minimum 300 DPI) to ensure clear details, especially for intricate patterns or text. Incorporate brand elements such as logos, color schemes, and fonts to maintain consistency across your cards. For personal projects, templates available online can streamline the design process, ensuring proper alignment and proportions. Pay close attention to margins and bleed areas; typically, a bleed of 3mm ensures that artwork extends beyond the cut line, preventing unwanted white borders. Consider layering effects, embossing, or foil accents for added texture and visual impact. Remember, simplicity often enhances readability, so avoid cluttered layouts and prioritize key information. Testing different design options on sample sheets helps in refining the final look before mass printing.
Printing Techniques and Settings
To achieve high-quality prints at home, fine-tune your printer settings based on the material and desired output. Select the highest print quality or photo mode to maximize detail and color accuracy. Adjust color profiles to match your design software’s output, ensuring consistent hues across all cards. Use appropriate paper settings—selecting the correct paper type within your printer driver prevents smudging or misalignment. When printing large batches, consider utilizing duplex printing features for double-sided cards, but ensure your printer supports this function without misregistering. For special effects such as metallic finishes or textured prints, specialized inks or compatible hardware may be necessary. Always perform test prints to calibrate color accuracy, alignment, and toner density. Proper maintenance of your printer, such as regular cleaning and ink cartridge checks, contributes to consistent results over time.
Cutting and Finishing Your Cards
Post-print finishing is crucial for delivering a polished look that mimics professionally produced cards. Use a precision paper cutter or guillotine to achieve straight, clean edges; this is especially important for business cards or formal invitations. For rounded corners or intricate shapes, employ a corner punch or craft knife with a metal ruler to ensure accuracy. After cutting, inspect each card for imperfections such as smudges, misalignments, or uneven edges. If your design incorporates special effects like embossing, foil stamping, or lamination, evaluate whether these can be accomplished at home or if professional services are required. Allow ink to dry completely before handling to prevent smudges. To enhance the durability and aesthetic appeal, consider applying protective coatings such as spray laminates or UV-resistant sprays. These finishing touches can significantly increase the lifespan and professionalism of your printed cards.
Common Challenges and Troubleshooting
While printing your own cards offers control over quality and design, it can come with challenges that require careful troubleshooting. Issues such as ink smudging, misalignment, color inconsistencies, or paper jams often stem from improper settings or incompatible materials. To resolve these, ensure your print head is clean and calibrated regularly, and verify that you are using the correct paper type setting in your printer. Performing trial runs on sample sheets allows you to identify misalignments or color issues before committing to large batches. Adjusting print speed, ink density, or switching to higher-quality settings can improve output. When dealing with thick or textured papers, examining printer manufacturer's guidelines ensures these materials are supported. For color management, confirm that your design software’s color profiles match those of your printer and paper to achieve consistency. Persistent issues may also be addressed by upgrading printer hardware or consulting manual guidelines for specific material compatibility.
Proper Finishing Techniques to Achieve a Professional Look
Once printing is complete, finishing techniques transform your cards from basic prints to professional-quality pieces. Precise trimming ensures uniform size and sharp edges. Rounded corners soften the appearance and reduce the risk of damage from sharp edges, which can be achieved with dedicated corner punches. Consider applying protective coatings such as spray laminates or UV sprays to shield against scratches, water, and fading. These coatings also enhance the color vibrancy and provide a glossy or matte finish, depending on your preference. If you aim for further embellishments like foil accents or embossing, assess whether at-home equipment can achieve the desired result, or if professional services are preferable for intricate details. Handling your cards carefully during and after finishing ensures no smudges or dents mar the final product. Properly finished cards will exhibit polished edges, vibrant colors, and a durable surface, elevating your project to a professional standard.